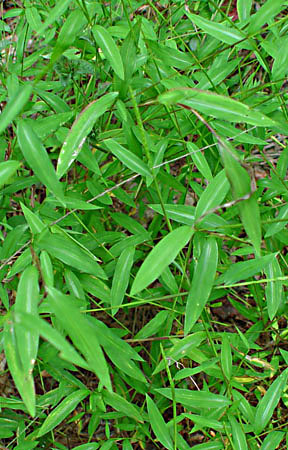
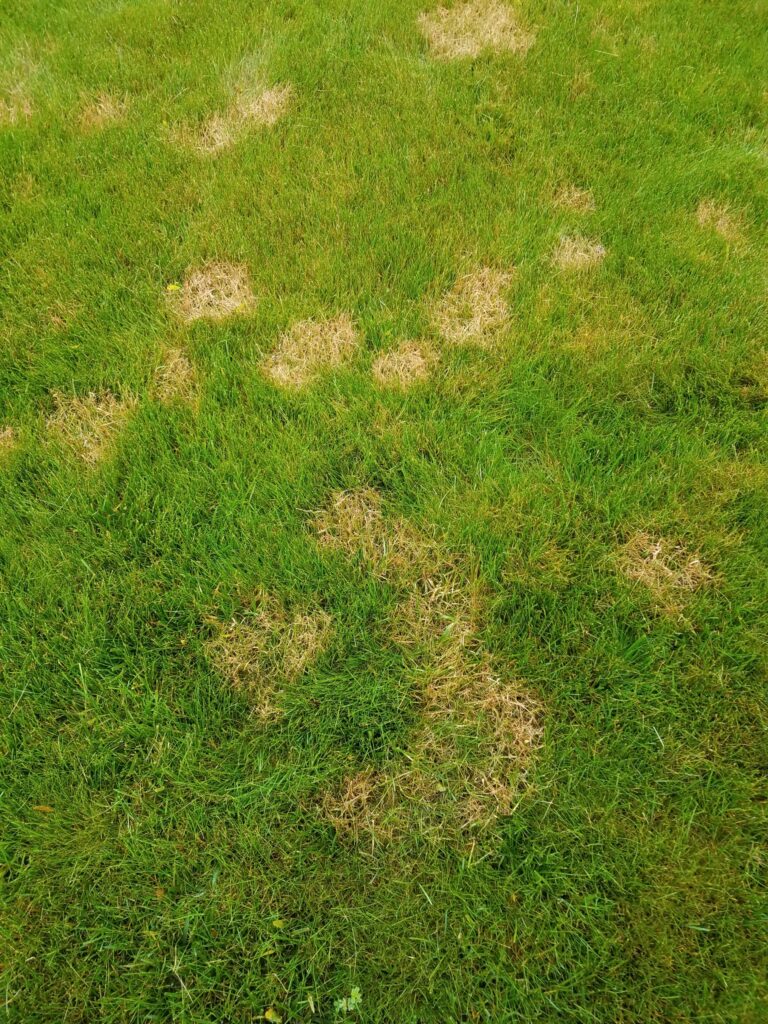
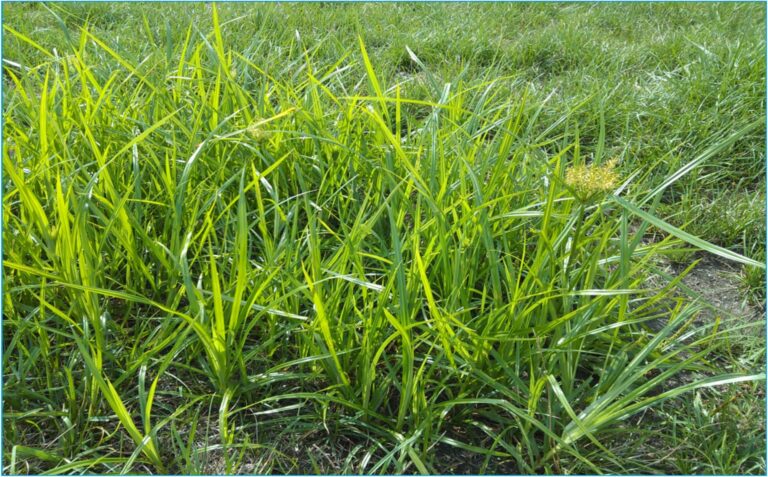
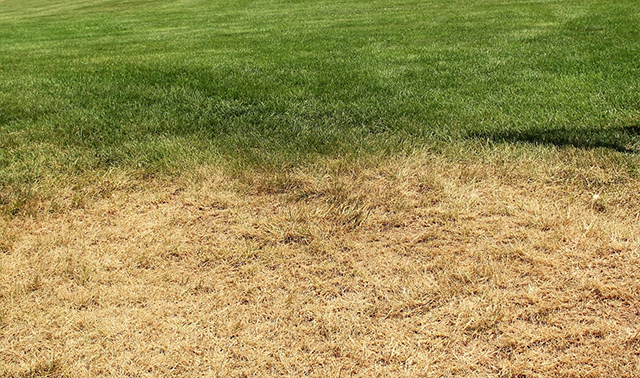
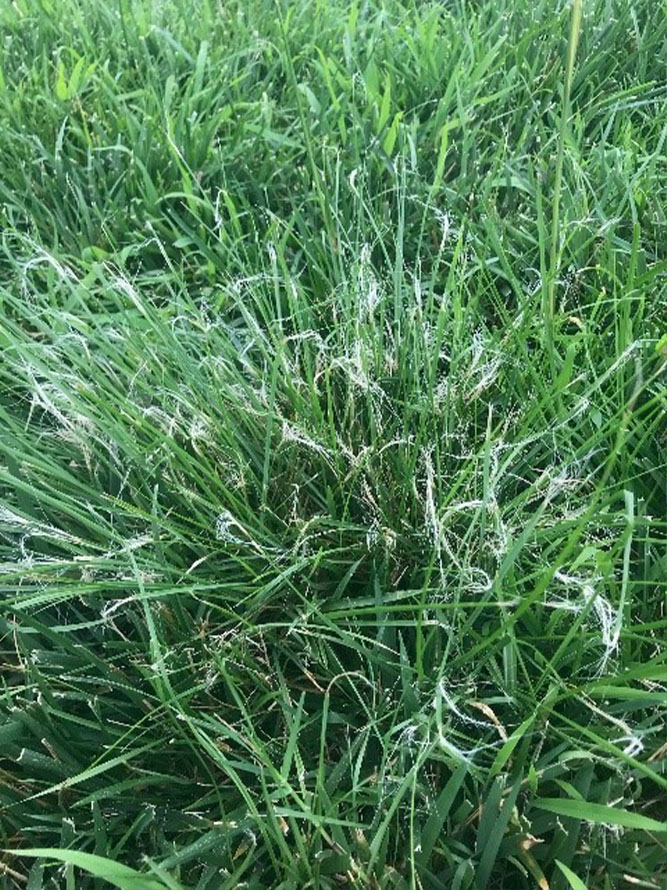
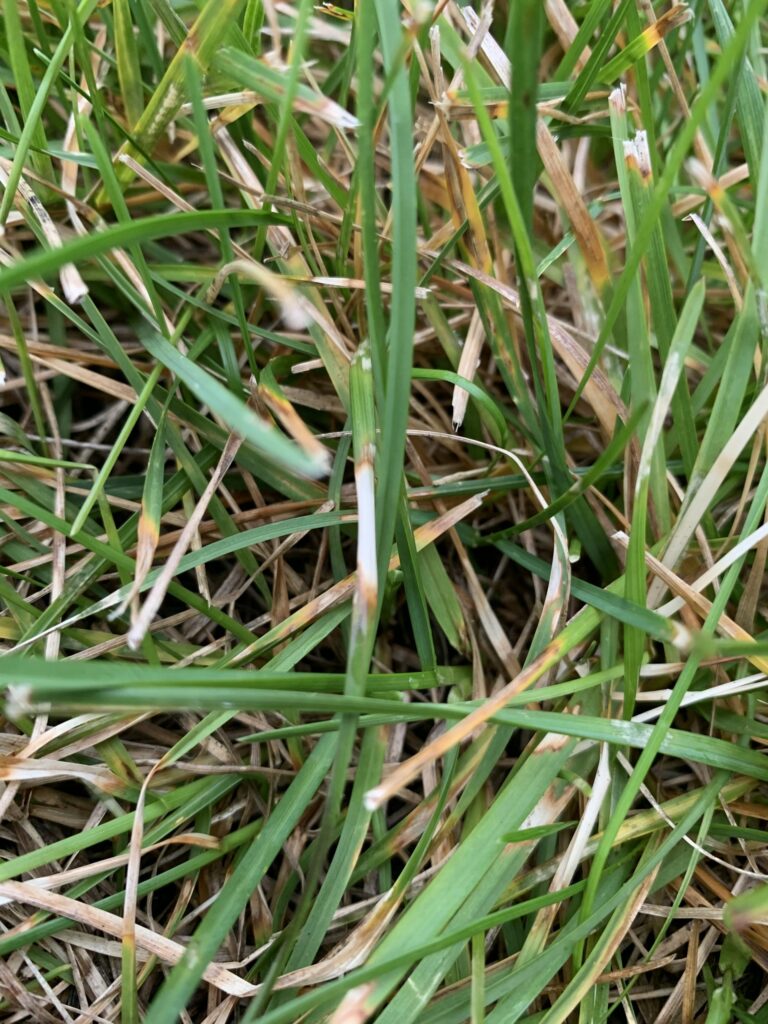
Fairway Green, Inc
9 Ilene Ct, Suite 14 Hillsborough, NJ 08844
Phone: (908) 281-7888

Category Archives: Summer Lawn Care

Japanese Stiltgrass

Japanese stiltgrass is an invasive summer annual that is troublesome for many homeowners, especially those whose properties are adjacent to wooded areas. Although this weed may be difficult to control and eradicate from residential lawns, this blog will walk you through why Japanese stiltgrass grows and how to go about controlling it.

About Japanese Stiltgrass

Japanese stiltgrass becomes active in late spring each year just before the far more infamous summer annual, crabgrass. Due to its creeping growth habit and low requirement for moisture and nutrients, it is highly adaptive and can spread across large areas. In wooded areas, it can blanket the entirety of the forest floor and can grow to three and a half feet in height.

From there, it can spread onto nearby residential lawns that may have shaded and thin turf and prove especially difficult to control. On a residential lawn kept at a 2”-3” mowing height, Japanese stiltgrass looks very similar to small bamboo shoots and can weave in and out of existing turf, forming dense, unsightly patches each summer. Not only does it contrast a great deal with the look of any desirable grass species in the lawn but being a summer annual, it will not persist beyond early fall. This leaves behind bare areas of exposed soil in its absence.

How to go about control

The decision on how to proceed with control measures depends on just how much of this weed exists on the property. If Japanese stiltgrass consists of most of your groundcover on your property, the best idea is to start with renovation seeding. Remember, Japanese stiltgrass is a summer annual, so it will die on its own once it becomes cooler heading into the fall. This means the lawn can be mechanically seeded with a slit seeder, core aerator, and/or dethatcher at the end of August.

In some cases, the weed cover may be too thick to seed through, especially if there are other weeds (and there usually are) in addition to the Japanese stiltgrass. If this is the case, it would be best to eliminate the worst portions of the lawn first using a non-selective weed and grass killer such as Roundup. This should be done around mid-August because seeding will have to be delayed 10-14 days following application of the herbicide.

Once the lawn has been established, or if you already had a pretty good lawn to begin with, steps must be taken to keep the Japanese stiltgrass from returning each year. Unlike the stiltgrass, desirable grasses used on home lawns require ample soil moisture and fertilization to grow vigorously enough to keep out invasive weed species. Keeping the lawn on a maintenance fertilizer program and promoting the growth of the grass will be the most important part of keeping out invasive weed species such as this one.

To gain more complete control over such an aggressor, use of herbicides will be necessary. Pre-emergent crabgrass control applications done each spring will help keep down some percentage of the Japanese stiltgrass. The control will not be as complete as it is for crabgrass, but the partial control it provides will be helpful. There are also selective herbicides that can be used to control whatever Japanese stiltgrass continues to come up in the summer. Treatments can be made to the lawn as necessary to suppress this weed while it is actively growing until the weather becomes cooler in the early fall and new growth ceases.

Conclusion

If you are struggling with Japanese stiltgrass on your property, the most important thing to keep in mind is that significant control takes time. To successfully control this weed we recommend establishing a thick lawn, then maintain the turf with a comprehensive fertilizer and weed control program each year. The biggest mistake homeowners make with this weed is trying to gain control with just a few selective applications in the summer, or having the lawn seeded without maintaining the turf.

When dealing with such a formidable issue such as Japanese stiltgrass, it is best to enlist the help of a professional lawn care company. A knowledgeable technician can walk you through the process of control step-by-step, as well as make any adjustments necessary to contend with other weed issues the lawn may develop. But even with professional help, the control will be progressive and can take years. Be patient and be persistent, and eventually you will develop the level of control you are looking for.

If you have questions about Japanese stiltgrass, and would like to speak to a licensed professional, please give our office a call at 908-281-7888, or request a free estimate online.

Feed Your Seed

Every year countless homeowners evaluate their lawn and decide it is time to seed. They warn their lawn care technician in hopes of having them avoid the newly seeded areas. While it is important that the lawn care applicator/technician be aware of the newly planted seed, thinking the area needs to be avoided is a common mistake. Newly planted lawn should be maintained with as much diligence as established turf. This article debunks the misconception that new grass should be avoided and explains why the best thing is to do the exact opposite.


Feed the New Seed

What is new seed after all? It’s a whole bunch of baby grass plants. As with mature grass plants, an important aspect of seed germination is to “feed” the young plants with proper nourishment. Some people have the idea that you should avoid new grass plants with regularly scheduled applications; however instead of avoiding the seeded sections, we recommend using a specific fertilizer intended for new grass.

Not Just Any Plant Food

Like feeding infants baby formula, new grass plants need to be fed specially formulated plant food commonly known as starter fertilizer.

Starter fertilizer comes in granular and liquid formulations and can include a lot of different micronutrients, but true starter fertilizer must contain phosphorus in high doses. Phosphorus is the chief nutrient responsible for new growth and is used in greatest bulk by new plants for their development. New Jersey, in an effort to protect against its overuse, has laws prohibiting the application of fertilizers containing phosphorus during regular lawn maintenance. However, this nutrient is so critical for the young grass plants that the law makes exception for its usage in establishing new grass.

How necessary is it really to apply phosphorus? Can the plant just get that from the soil? Most of the phosphorus contained in the soil is bonded too tightly to the soil and cannot be extracted by immature grass roots. In addition to this, the newly forming grass roots are very shallow. Starter fertilizer containing the phosphorus needs to be delivered to the surface where roots can absorb the nutrient as it becomes available before it gets bound by the soil particles

What’s the Rush?

We want the new grass plants to mature as quickly as possible in order to withstand environmental conditions they will face. Whether it is the summer heat, drought stress, winter dormancy or disease; the well-established root system of mature grass plants have a better chance of surviving stressful environmental events compared to young grass.

Most seeding takes place in the spring or toward the end of summer. In the spring, the new plants need to mature as quickly as they can to develop a root system capable of supporting the plants through the upcoming summer. Therefore, it is extremely important to plant grass seed as early in the spring as possible (March or early April once snow cover is gone). The chances of getting a lot of desirable grass to germinate and establish in such a small window of time before summer heat arrives are already slim, so if the grass is to have any real chance at all, the process must be accelerated by applying starter fertilizer. For more information about seeding in the spring, check out our blog.

This same principle holds true for seeding that takes place at the end of summer, but obviously the race is against the cold instead of the heat. Therefore, larger seeding projects are best scheduled for this time as opposed to spring. Though the weather is more beneficial for longer, it is still important to appropriately fertilize the new grass to improve the overall turnaround on the seed. After all, having the highest percentage of new plants develop is often what categorizes the work as a success.

The final concern would be pathogenic fungi or turf disease. In trying to establish new seed, the areas addressed should be getting watered lightly at least once if not multiple times each day. While this is the correct way to ensure grass development, it can also promote unwanted disease activity. While the grass is very young, foliar diseases such as dollar spot, brown patch, and leaf spot can be very damaging to the plants. Feeding the plants with starter fertilizer will help them develop quicker and give them the nutrients they need to fortify themselves against potential threats.

Now You Know

While it is important not to treat the new seed inadvertently with potentially damaging herbicide, it can be equally damaging to avoid the area altogether. Next time you seed the lawn, speak with your lawn care technician about adjusting subsequent treatments and make sure that the new grass is addressed with starter fertilizer. Not only will he or she know to bring the correct product to the property each time, but they will also be able to monitor those areas during future treatments. Your lawn maintenance company is there to service the needs of the property and customize treatments whenever necessary. Be sure to take full advantage of all the benefits your company has to offer, not just for your established lawn, but for your new seed as well.

If you are in our service area and have questions about seeding or applying fertilizer, give our office a call or request a free estimate.

Summer Lawn Care Mistakes

Maintaining a lawn can be difficult through the varying environmental and cultural factors we see here in New Jersey. For example, common mistakes with mowing and watering can greatly impact the health and appearance of your lawn. Below we have outlined some common mistakes homeowners make throughout the summer months and what can be done to correct them.

  1. Watering incorrectly

What are good watering practices? Well, it is often dependent on what type of summer we are experiencing. The past two years have been record breaking in the amount of rainfall received. This year our summer has started out pretty dry!  If your lawn is experiencing drought stress, setting up sprinklers correctly is very important. The best time to water your lawn is between 12 am to 6 am – yes, when you are sleeping.  This minimizes water loss from evaporation and allows the moisture to penetrate deeper into the soil.  It also reduces the risk of getting disease because we are watering when the grass blades are already wet from dew formation.  You can learn more about lawn disease by clicking this link. (Insert link to disease blog please not sure if it’s posted)

When watering with an underground irrigation system, have your system set to run 1 – 1 ½ hours twice a week. If you have hose-end sprinklers, we recommend purchasing a valve timer and setting your sprinkler to run for 2 hours, twice per week. These run times are a great starting point, but you will need to make adjustments based on the layout of your property (full sun vs shade) and more importantly, the weather.  For example, this year the weather has been very hot and dry so run times should be increased to minimize stress and keep plants healthy.

Check out more information about a lawn watering schedule here.

  1. Mowing the grass too short

In the spring and summer months, healthy grass grows fast! It might seem tempting to mow your grass short to decrease mowing frequency; however, mowing the grass too short can have an impact on the health and appearance of your lawn. The best mowing height in our service area is about 3 – 3 ½ inches in length. When mowing the lawn, only cut 1/3 of the grass plant at a time. Removing too much of the grass blade at one time can weaken the plant and reduce its ability to withstand other environmental issues such as disease and insects.

  1. Mowing the grass with dull blades

Mowing damage from dull blades is common and easily avoidable. Have the mower blades sharpened regularly to avoid frayed grass blades. Dull blades can tear, shred, and bruise the ends of the grass plants, this weakens the plant and makes an excellent spot for disease to start.

  1. Not treating disease with fungicides

There are many types of turf diseases, some are only cosmetic while others can rapidly kill the turf in a short period of time. If there is disease present on your lawn, it’s critical to identify it first so you can understand the potential issues as well as treatment options. For diseases that cause significant damage, like brown patch and leaf spot, applying a fungicide when the disease first emerges can save the health of the rest of your turf. Applying fungicides after the disease is present stops the disease from spreading. By skipping the fungicide, disease can spread through your whole lawn causing large areas of dead turf. For people with disease issues year after year, a preventative fungicide application may be recommended. Speak to a lawn care professional if this is the case.

  1. Skipping grub control

Grubs cause substantial damage to lawns in our area annually. Beetles lay their eggs in the soil and eventually the eggs hatch into grubs, which survive by eating plant roots. Over time, as the larvae continue to feed, areas of the lawn turn brown and feel sponge like as you walk over them. When examining your lawn, if grubs are present, the grass will pull up like a carpet and often you will see the grubs underneath the surface. To avoid grub damage, there is a preventative treatment you can apply to the lawn in the summer.

An ounce of prevention is worth a pound of cure! The treatment for controlling larger grubs is much more expensive and because the grubs are more mature, it’s not as effective either. In addition, most areas damaged by grubs will need to be reseeded to establish new turf. If you’re thinking about skipping the grub control application to save money, you may want to reconsider!

Conclusion

These common lawn care mistakes can be rectified and in turn help the overall health and appearance of your lawn! If you are in our service area, and have any questions about the information provided above, please give our office a call to discuss.

What Causes Lawn Disease?

Each year homeowners call about areas of their lawn turning brown or dying and want us to come evaluate the problem. There are several different things that could be causing the issue; however, disease is the most questioned and misunderstood diagnosis. What causes lawn disease? The environment is the biggest factor in why your lawn gets disease. In this blog, we are going to dive in a little deeper and help you understand exactly which environmental conditions are to blame.

Before we get into the different environmental conditions, let’s first discuss how plants get infected. The disease triangle below is not just for turf, but all plants susceptible to disease.

All three corners of the disease triangle must be present for the disease to occur. The host is a plant susceptible to disease. The pathogen is typically a fungus for most lawn diseases. The environment refers to the conditions that a specific disease needs to enter a plant.

The Host

For turf, defining the host is easy, it’s the types of grass varieties you have on the property. All grass varieties are different, and some are more susceptible to certain diseases than others. Knowing the grass variety will help you narrow down the list of potential diseases you need to be on the lookout for.

New grass varieties are constantly being developed that are marketed as more resistant to disease. We will touch on using these new varieties later in the blog, but it’s important to note that these varieties are resistant, NOT IMMUNE, so disease can still infect the plant. The same holds true for resistant trees and shrubs, just because they are resistant, does not mean those trees and shrubs will never get disease.

The Pathogen

The pathogens that cause lawn disease are typically fungus but can also be bacteria or virus. The fungus needs to be present in the soil, it gets there by creating spores that get moved by wind or are carried over by animals. Pathogen presence is not in our control, so for this blog we will just assume the pathogens are in the soil.

The Environment

The environment is the final corner of the disease triangle and the most critical. There are certain practices we can follow to minimize environmental impacts. For turf, fungal pathogens can enter the plant when two conditions are present. The first is temperature, most fungal pathogens prefer warmer weather, above 70 degrees Fahrenheit during the day, but more critical are temperatures at night. Depending on the actual fungus, most need nighttime temperatures to be above 55 degrees. The second condition is moisture, pathogens can enter the host when the leaf tissue is wet. This means your lawn is most susceptible to disease when the nighttime temperatures are high and it’s raining or very humid. We can’t control the weather, so if we get the right environmental conditions, disease can become an issue. The past two seasons in New Jersey were not typical with respect to the large amounts of rainfall we received, especially during the late summer and early fall months. Both years we also saw a large spike in disease activity, not only on home lawns but on sports fields and golf courses as well.

What Can We Do?

So, if I can’t control the weather, the pathogen is already in my soil, and the host is susceptible, is there anything I can do? Absolutely! Let’s start by looking at the moisture portion of the environment. This is very important, especially if you have irrigation. If the temperatures at night are above 55 degrees and you have your irrigation set to water every single day for 30 minutes, you are creating the perfect environment for disease by getting the leaf tissue wet every day! Watering correctly is critical, especially when the temperatures are ideal for disease. You want to water infrequently, between the hours of 12am and 6am are ideal because the grass is already wet from dew formation. A good starting point is to water your lawn only twice per week at approximately 1 hour per zone between 12am and 6am. This only a starting point and will change depending on the weather, for more detailed watering instructions click here for a blog on proper watering schedules.

Still focusing on moisture, we need to look at a few other things. Is your soil compacted? If so, the water will remain on the surface, taking longer to drain into the ground. Improve drainage by aerating your lawn at least every other year or even more often if it’s severely compacted. Grading also plays a role, lower sections of turf will retain moisture longer, making it more likely for a pathogen to enter and infect those plants. Have a landscaper improve the grading to get even run off and minimize the pooling of water in low areas.

Seeding

Hopefully by now, you understand how the environment plays a key role in causing lawn disease, especially moisture! If you have addressed the moisture issues above and disease is still an issue, another option to try is overseeding with a newer variety of turf. You’ll want to pick a variety that is more disease resistant and made for the environment you are seeding (sun seed in the sun, shade seed in the shade). Plants that are already under stress are more likely to get infected by a pathogen than those that are healthy. This means that your shade loving grass variety planted in the full sun will be really stressed out in the summer heat and more likely to get disease each year. Use seed that is right for the environment you are planting in, try to avoid the generic “Sun and shade mixes” if possible. Remember, disease resistance does not mean immune!

Chemical Control

Another option for battling disease is chemical control with a fungicide. Some diseases attack the roots, by the time you see the impacts on the surface, it is too late to treat, and preventative control should be considered in the future. Other diseases can be treated, most foliar diseases can be stopped for approximately 30 days with a fungicide. A very common question with fungicides is “Is this it, or will I need another fungicide?” The answer to that all depends on…yup you guessed it, the weather! After 30 days, if the lows at night are above 55 degrees and its very humid or rainy, then the disease could become active again.

One of the main barriers to applying fungicides is cost. Fungicides are some of the most expensive products in the lawn care industry. If you have zero tolerance for disease in your lawn, then monthly preventative fungicide treatments in the late spring and summer is the way to go, but it’s not cheap. Another option is to hold off until the forecast shows favorable disease conditions. At that point you can have a fungicide applied to protect the turf for 30 days. The final option is to treat the disease after it has already infected the plant. This will stop the disease from spreading for approximately 30 days and it’s important to treat it as soon as possible. The longer it’s active, the less likely it is for the infected plants to recover. Waiting to treat after the plant is infected is not always an option, for some diseases it’s either too late or no products exist to effectively stop the spread. Your lawn care provider can diagnose the disease and let you know what options are available. You can also have a sample of your turf tested to confirm disease is the culprit.

Conclusion

Hopefully, you have a better understanding of what causes lawn disease after reading this blog post. If you’re in our service area and have questions about disease, or anything lawn care related, please give our office a call at 908-281-7888.


Nutsedge: Causes and How We Can Treat It

As a homeowner with a maintained lawn, you may have heard of something called Nutsedge. Sometimes referred to as “sedgegrass,” “nutgrass,” or “watergrass,” this undesirable plant that tends to grow in wet areas is troublesome to many home lawns. Also, nutsedge is not a grass or a broadleaf weed, it is in the sedge family. This perennial plant grows from nutlets and rhizomes in the soil, that can remain there for many seasons. Throughout this blog we will dive deeper into identifying and treating the unsightly plant.

How to Identify Nutsedge

Nutsedge is easy to identify in a well-maintained lawn. In the summer months you might notice a small area of tall lime-green colored grass that is standing out amongst your lawn, this is typically nutsedge. One way to be sure is to look closely at the plant; the plant has a triangular base, and the nutsedge blade has a pronounced mid rib running down the middle.

What to Do If I have Nutsedge

  • Nutsedge is most problematic in lawns that have poor drainage or stay wet too long. This could be from overwatering with a sprinkler system, a lot of rain, or a combination of both. The best way to minimize nutsedge is to grow and maintain dense and healthy turf to outcompete nutsedge for space, food, and moisture.Low spots in the lawn that hold water also contribute to the proliferation of nutsedge. If you have drainage issues where water is pooling and is not running off or percolating into the soil, you may need to install drains or regrade the soil on the property. This will help move the water along, so it doesn’t sit causing the soil to remain wet for long periods of time. Additionally, you may want to rethink your watering schedule and timing in those zones, if you don’t want to regrade or add drainage.

    For information about cultural practices that may help with nutsedge control, you can read our blogs about each topic.

Should I pull Nutsedge out by hand?

We do not recommend pulling nutsedge out by hand. The reason being, when you pull nutsedge out by hand, you are only removing the blade above the soil. The nutlets and rhizomes are still present in the soil. Without killing the nutlets and rhizomes the nutsedge plants will continue to regrow in the same spot.

Chemical Control Option

At this point there are no preventatives for nutsedge currently on the market, so this only leaves post emergent control options. It’s important to know that traditional broadleaf weed and/or crabgrass controls do not kill or prevent nutsedge. Why? Nutsedge is not a broadleaf weed or grass, it’s considered a sedge. For nutsedge control a specialized product specifically or nutsedge provides adequate control when applied properly. Also, you may need more than one treatment to control the nutsedge present in the lawn. We recommend contacting a professional lawn care company to treat the nutsedge.

Homeowners can also treat nutsedge. We recommend if you are going to treat the nutsedge yourself to follow the label instructions closely to get the proper control. Finally, give the product time to work before you apply more.

We do not recommend using a non-selective herbicide (i.e. Round-Up) to control nutsedge. Products like this will damage the turf surrounding the nutsedge as well! This would lead to larger damaged areas of turf that will need to be seeded to establish grass again; the idea is to kill the nutsedge, not the desired grass around it.

Conclusion

As the temperatures decrease with the onset of Fall, nutsedge will naturally start to die out on its own. It is important to remember that although the nutsedge blade is gone the nutlets will still be in the soil and will not die from the colder weather. Nutlets will produce new plants the next season and the nutsedge cycle will start over again, if left untreated.

Treating the nutsedge each year with a chemical control helps to reduce the amount of nutsedge present in the lawn from year to year. Although you may never eradicate the plant from your lawn entirely, a reduced number is more manageable than leaving it untreated.

If you are in our service area, and have questions about nutsedge control, request a free estimate online or give our office a call at 908-281-7888.

The Benefits of Preventative Grub Control

As the old saying goes “an ounce of prevention is worth a pound of cure.” This statement is spot on when it comes to preventing grubs and the damage associated with them.

Beetle Life Cycle

Before we get into the benefits of preventative grub control, we need to understand grubs and how they can impact your lawn. Grubs are the sub-surface larval stage of beetles. Although there are several types of beetles, most people are familiar with Japanese Beetles because they like to dine on our favorite trees and shrubs. Beetle species in our area typically lay eggs in the summer, sometime between June and early August depending on the species and environmental conditions.

The eggs hatch into grubs, which survive by eating plant roots, especially grass plants. Over time, as the larvae continue to feed, areas of the lawn turn brown and feel sponge like as you walk over it. An easy way to determine if grubs are the culprit is to pull on the actual grass plants. The grass pulls right up like a carpet and expose the feeding grubs underneath. The grubs are typically white and shaped like the letter C.

White grubs burrowing into the soil. The larva of a chafer beetle, sometimes known as the May beetle, June bug or June Beetle.

Grub Prevention

To avoid having this happen to your lawn, apply a preventative grub control to the lawn in the summer. The product moves into the soil prior to the eggs hatching, providing protection to your plants from feeding larvae. The application is very effective at controlling grubs and saves you lots of time and money compared to dealing with the issue after the fact.

Post-Emergent Grub Control

If you did apply a preventative grub control, and you find grubs damaging your lawn, there are still things you can do to help. You should treat the grubs, but keep in mind the treatment is less effective when compared to preventative treatments because the grubs are larger and more mature. Every person on the planet is not born on the same day, we all have different birthdays. The same can be said for grubs. They don’t all hatch from their eggs in the soil on the same day. The younger the grub the more effective the material is on it, the older (more mature) the grub, the less effective the material is on it. At this point it is safe to say that this material applied at this stage will produce about 60-70 percent control results on the actively feeding grubs. Typically, the treatments to control the grubs at this stage of their life cycle requires heavy watering after the application as well. This helps move the product to the root zone, where the grubs are feeding.

When grubs have caused damage to turf, the grass can be easily separated from the soil exposing the grubs underneath.

What is more cost effective?

One benefit to preventative grub control is saving money. Products used to preventatively treat grubs are typically much cheaper than the ones used to control them after they have matured. The results are also more effective when treating them preventatively, so you’re getting better control at a lower cost.

Because grubs feed on the root system, the damage they cause kills the plant and reseeding will be necessary to help those areas recover. Another benefit to preventatively controlling grubs is you won’t have to spend your time and money reseeding grub damaged areas of your turf, that is often very costly.

Conclusion

A little bit of prevention goes a long way when it comes to grub control. Save yourself the time and hassle associated with controlling mature grubs and reseeding damaged areas by getting a preventative grub control application this summer. Whether you do it yourself or have a lawn care professional apply the treatment, we highly recommend it. If you are in our service area and have any questions about grub control, feel free to contact us at 908-281-7888.

Lawn Watering Schedule

properly watered lawn next to dormant lawn

Summer is in full swing and the warm weather makes it perfect to enjoy your outdoor living space. Unfortunately, the same warm weather and lack of rain can really stress your lawn. Maintaining a lawn and landscape takes a lot of work and effort, but there are few cultural practices that are important to keep your lawn looking great throughout the summer.

In addition to following our mowing best practices, another summer cultural practice that will greatly improve the look of your lawn is to implement a lawn watering schedule. When executing a lawn watering schedule, we highly stress sticking to a schedule. Rotating between watering and not watering can weaken the glass plant. Additionally, these recommendations are for the soil types with a considerable amount of clay in them. For sandy soil, the watering recommendation will be completely different.

properly watered lawn next to dormant lawn

This image captures the difference between a lawn properly watered and a dormant lawn.

Lawn Watering Schedule

The best time to water your lawn is between the hours of 12 am and 6 am. This helps minimize water loss to evaporation because this time of the day is often cooler and more humid. This also allows the water to penetrate deeper into the soil and minimizes the length of time the grass blades remain wet, since the blades will already be covered in dew. This helps reduce the susceptibility for turf diseases.

Frequency of Watering

We recommend watering your lawn like a heavy rainstorm; putting a lot of water down at once! It is important to water in a way that will reach the depth of the turf’s root system. A good starting point in our area is to provide 1 inch of water per week. For underground irrigation systems, you want to have your system set to run 1 – 1 ½ hours twice a week.

If you have hose-end sprinklers, we recommend purchasing a valve timer and setting your sprinkler to run for 4 hours, once per week.  These run times are approximations to get you to 1 inch of water per week, the timing may vary slightly depending on the type of sprinklers installed.

If your following the watering schedule and your soil is still drying out and you notice browning, try adding an extra half hour of run time to each zone. Always start by adding time to the current watering schedule, rather than adding another day.

Frequent and short watering (15 minutes per zone everyday) is not a good lawn watering schedule. It will promote a shallow root system which can weaken the grass plant and encourages disease. Unfortunately, this is something we come across quite often. Deep, infrequent watering is recommended and will help create a deeper root system, resulting in a stronger grass plant.

Conclusion

Once a lawn goes dormant, it will take a few weeks of good watering for the grass to exit dormancy.  Therefore, it is important to start watering early in the year and not stop. If you keep up with the watering schedule, your turf will have plenty of moisture over the entire summer.

Summer is a great time to spend outside but can be very stressful on your lawn. Following a few cultural best practices can really make a difference when it comes to having a healthy lawn all summer long.  If you have any questions about summer cultural practices or want more information about a lawn watering schedule, please request an online estimate or give our office a call at 908-281-7888.

What is the Right Grass Mowing Height?

Frayed blades of grass

Here in New Jersey, summer time has arrived; and now is the time to enjoy your outdoor living space. There are many ways to make your outdoor property look great this summer, including your lawn. Maintaining a lawn and landscape takes a lot of work and effort, but there are few cultural practices that are important to keep your lawn looking great throughout the summer.

To start, here in New Jersey we deal primarily with northern turf grass species. This includes Rye grass, Blue grass, Tall Fescue, Fine Fescues and Chewing Fescue turf varieties. Our below recommendations to follow are averages that can be used by a homeowner to cover norther turf grass species.

One of the very first cultural practices is proper mowing. It may seem like an easy task, just take your mower out of the shed, and go to town on your lawn. There’s a little bit more to it than that, like knowing the right grass mowing height. Below we will go through several mowing best practices.

Grass Mowing Height

Proper grass mowing height and proper frequency is essential to the health of your lawn. The best grass mowing height in our area is about 3 – 3 ½ inches in length. When mowing the lawn, mow off only 1/3 of the grass plant at a time. We recommend frequency of mowing should depend on how tall the grass is, and not necessarily following a calendar schedule. For example, if a lawn is being kept at 3 inches in height, it should be mowed when the grass reaches 4 ½ inches, not every other Wednesday. By removing too much of the grass blade at one time, it can weaken the plant which in turn will reduce its ability to withstand other environmental issues such as disease, surface feeding insects and even invasion of broadleaf weeds.

Also, be very careful not to cut the lawn too short or weedwack the edges too close. This is commonly referred to as scalping. Scalping is when too much of the grass blade is mowed off at one time and the stem and crown of the plants are left exposed. Scalping a lawn whether it is from mowing too short or uneven ground can cause injury to the plant. Raising the mower blades higher will help reduce this problem and watering properly helps aid in recovery of scalped areas. Sometimes seeding is needed to repair permanently damaged scalped areas.

When finding the best grass mowing height, it is best to keep the grass tall. Keeping it tall will help shade the soil under the turf canopy and keep the soil cooler. This will help to reduce the number of weeds that grow.

Frayed blades of grass

This picture displays frayed grass blades from a dull mower blade.

Mowing Blades

You may have already been mowing this season but, make sure that you have the mower blades sharpened regularly and you also perform regular maintenance on your mower like changing the oil and spark plugs regularly. Dull mower blades can tear, bruise and shred the grass blade causing injury to the turf. It can weaken the grass plant, and an open wound on grass blades are excellent spots for disease.

Other Best Practices

We also recommend not mowing your lawn when the grass is wet. Dew or any type of excessive moisture on the grass blades is an excellent way to spread lawn diseases. Also, avoid mowing midday in the full heat of the day because it can place extra stress on the plant. Mow in the cool of the morning after the dew has evaporated, or in the evening.

When mowing the lawn also try to change up the direction you typically mow. Mowing the lawn in same direction every time will cause the grass to lean that way. Mowing in different directions each time you cut the lawn will help the grass grow more upright.

Do not bag your grass clippings because leaving the clippings behind is beneficial for the lawn. This is a process called “grass-cycling”. The benefits of this process are that it puts moisture and nutrients back into the lawn. Contrary to popular belief it does not contribute to thatch build up. Sometimes bagging or removing clippings is unavoidable. If the clippings are too plentiful or too long and clump up, those should be removed. If left in clumps the grass underneath can suffocate and die off.

Conclusion

By following our best practices, like proper grass mowing height, you can reduce various problems in your lawn. Maintaining a lawn and landscape can take a lot of effort and a great amount of knowledge. If you have any questions regarding best mowing practices, please request an estimate or give our office a call at 908-281-7888.

Watering the Plants in your Landscape

Watering the Plants

Homeowners are quick to water the lawn when it begins to turn brown. What many homeowners forget to do is water their plants as well. Trees and shrubs are living things, and like all living things, they need water for survival.

Watering Methods

The big questions are, how much water do your trees and shrubs need, and what is the proper way to water them? There are many variations of ways to watering plants: using a bucket or plant waterer, with a hose, and utilizing an underground sprinkler system are a few methods.

The easiest way to water your plants is by using an underground lawn irrigation system with a timer on it. Set it and forget it, right? The only problem is that your lawn irrigation system function is to water your lawn, not your landscape plants. For example, an automated lawn irrigation system in hot and dry seasons is not going to provide enough water when watering your plants. A specialized irrigation system can be installed for your landscape plants through your irrigation company.

There are also hoses that you can buy at your local garden supply store that you can lay on the ground around the plants, they are normally referred to as soaker hoses. These hoses have tiny holes in them that allows water to seep out of it and into the soil. Additionally, external timers can be purchased at garden centers to turn the water on and off at your discretion. These hoses are handy because once you set them around the plants, all you have to do is to turn on the water. The other option with hoses is to water with a conventional hose without a nozzle attachment. With this type of hose you should place the hose at the base of each plant. With a hose running half of the maximum flow rate, trees can be watered around 30 minutes and shrubs for about five minutes. Depending on the size of your landscape, watering the plants could take quite some time.

Finally, watering with a watering can or bucket is another option. There are pros and cons to this method. Let’s start with the pros. First, you can control the amount of water that is being applied. For instance, you may know how many gallons said bucket is, and you could use that knowledge and to see how much water you are applying. Also, you can better control the rate at which the water is coming out. As for cons, there is one major one, it could be a lot of physical work! The watering can could be heavy and require multiple trips to the spigot for filling.

How much water do you need?

Now that we have watering methods out of the way, how much water is needed for your plants? The general rule is when you water shrubs, soak the soil approximately 12 inches deep. Keep in mind that the roots from the plants can extend out about 3 times the canopy spread. For example, if the canopy spread is about 2 feet, then the root spread would be about 6 feet. These root spreads are vital in taking up water. So, how do you know when you’ve reached the watering depth of 12 inches? A soil probe. This is an apparatus that you insert into the soil and it pulls out a plug. If you can get the probe 12 inches into the soil, you’re fine. As for how often, you should water the plants when the soil probe cannot get past 3-4 inches.

How often should you water your flowers and perennials? They do not need as much water as trees and shrubs because their root zone is closer to the soil. During hot, dry periods, you should water every day to where the soil is moist. These types of plants can dry out quickly if not watered frequently enough. You should also water early in the morning because it would allow the foliage of flowers to dry out. Leaving the foliage wet for too long can allow the plants to be more susceptible to diseases.

Finally, newly transplanted trees and shrubs require more water than established plants. Keep in mind that these plants are planted with a root zone that is much smaller than that of an established plant. So, for new transplants, watering as close to the base of the plants is best to allow the water to seep into the root zone. Water these plants every other day for the first couple months to promote establishment. It can take 2 to 3 years before a newly transplanted tree or shrub becomes firmly established.

Conclusion

Being vigilant with watering your plants allows you to enjoy the beauty of the landscape you are trying to create. If you are in our service area or have any questions, feel free to contact us at 908-281-7888 or visit our website at www.fairwaygreeninc.com.


11 Summer Lawn Care Tips

Summer lawn care tips green grass

When thinking of summer we often think of relaxing and enjoying our home and lawn. The summer however, is the most stressful time of year for a lawn, it is brutally hot and very tough on your turf. Below are our 11 lawn care tips for the summer to keep your lawn healthy and green all season long.

Mow properly

Mowing at the proper height is essential. Mowing the turf high is best for the health of your grass and it is recommended to keep the grass cut at 3 – 3 ½ inches throughout the season. By keeping the grass taller, the lawn obtains more sunlight during the day which helps the grass produce food and energy. Keeping the grass tall also helps to shade the soil under the turf canopy, helping to keep the soil moist and reduce weed growth. Mowing too short weakens the turf which causes stress to the grass plant leading to drought stress, disease activity and permanent injury.

Sharpen mower blades

Have the mower blades sharpened regularly throughout the season. Keeping the blades razor sharp ensures that the grass is getting cut cleanly. When the blades are dull they rip or shred the grass blades which is harmful to the grass. This weakening of the turf can lead to drought stress, disease activity and even permanent injury. It is best to wash off your lawn equipment to avoid spreading disease to the turf the next time the lawn is mowed.

Leave grass clippings

Leave your grass clippings behind. By bagging your grass clippings, you are robbing your lawn of any extra nutrients that it can use throughout the summer months. Also leaving the clippings behind shades the soil, helping to maintain moisture.

Fertilize your lawn

Applying fertilizer in the summer gives your lawn nutrients on a regular basis and helps to keep it growing and healthy.

Properly water your lawn

It is recommended that a lawn be watered between 12 am and 6 am. An underground irrigation system should be run 1- 1 ½ hours per zone twice per week. Hose-end sprinklers should be run for 4 hours per zone once per week, both resulting in 1 inch of water on the lawn per week. Watering in the early evening (6 pm – 12 am) keeps the lawn wetter longer, which increases disease activity. Watering during the early morning hours reduces the amount of time your lawn is wet which minimizes disease activity. It also reduces water evaporation. Watering during the day (12 pm – 6 pm) is not beneficial to your lawn because most of the water being applied during the day evaporates by the sun and will not be utilized by the plant. Frequent and short watering causes a shallow root system which weakens the grass plants. Watering properly helps create a deeper, stronger root system which creates a healthier, greener lawn. Check out our blog article to learn more about watering your lawn.

Control lawn disease

If a disease outbreak does occur, a fungicide can be applied. A fungicide stops the further spreading of a disease to uninfected areas of the lawn for about 20-30 days depending on site conditions. If environmental conditions do not improve, multiple fungicides will be needed until the disease is in-active.

Control surface feeding insects

Surface feeding insects can cause substantial damage during the season. If the turf is struggling or weak, insects exploit that weakness and cause damage. Insect damage starts out looking like drought stress then gradually the turf thins and turns yellow. Insect controls should be applied when the insects are present. Additionally, insect damage can be permanent and seeding to repair the damage may be needed.

Apply a grub preventer

A grub preventer protects your lawn against grubs and the damage associated with them, which can be quite extensive. Grubs are the larva of beetles, and they chew off the roots close to the soil surface severing the plant from the roots. Signs of grub damage include; gradual thinning, yellowing, wilting and the appearance of scattered, irregular dead patches. The patches can increase in size and may join together to form larger areas of dead grass. Grub damage can be permanent and seeding to repair the damage may be needed. If interested in learning more about grubs and how to control them, check out a more indepth description here.

Control the weeds

Throughout the summer, weeds can become a major problem. They can be hand pulled or controlled using a more traditional method way, applying herbicide. Whatever method of control you choose, keeping the lawn weed free results in a healthy and great looking lawn. If you want to learn more about weed control, more information can be found here.

Clean up after your pet

Pet damage can kill off small portions of lawn wherever your pet relieves itself. Rinse the areas with water to flush out the pet’s urine in the soil. It is best to have your pet go onto a mulched area or a non-conspicuous area of the lawn. Pet damage at the end of the season needs to be repaired by seeding.

Seed the lawn

If at the end of the season your lawn is thin or bare from disease, insect, grub or pet damage, it is best to seed from the middle of August through the end of September. Seeding is the only way to reestablish grass in an area that has no grass or to fix any damage that has happened from the summer months. Make sure to purchase grass types appropriate to the location where the seeding is taking place, meaning if it is a shady area use shade tolerant grass types, if it’s in a sunny area use sun tolerant grass types.

These four steps below can help to make any seeding a successful seeding:

Step 1. Loosen the soil or add a layer of top soil to a 1 – 1 ½ inch depth.

Step 2. Apply the appropriate amount of grass seed. To find out what that may be, we recommend reading the label on the bag and consulting online research.

Step 3. Spread the grass seed and lightly mix the seed and loosened soil together (the more seed to soil contact the better the germination rate).

Step 4. Water, 20 minutes per zone twice per day for 6 – 8 weeks after seeding is completed to keep the soil moist.

Conclusion

There is nothing more important than good cultural practices. Summer lawn treatments can include proper watering, mowing, fertilizing and weed and insect control. These steps can keep your lawn healthy and beautiful all season long.

If you are looking for lawn service or have questions and are in our service area, give Fairway Green Inc. a call at 908-281-7888, we are happy to help.

9 Ilene Ct, Suite 14, Hillsborough, NJ 08844 United States | (908) 281-7888
Phone: (908) 281-7888 Fairway Green Inc.